If you allow other users to post to your Facebook page, legitimate posts may sometimes get flagged as “spam”. So it’s a good idea to periodically check your Page for any posts incorrectly marked and take the appropriate action for each of them.
Why would you want to allow other users to post to your Page? Every business page is different, but if you want to increase engagement on your Page, then allowing visitors to post a photo, video or simple text may be one part of your Facebook plan.
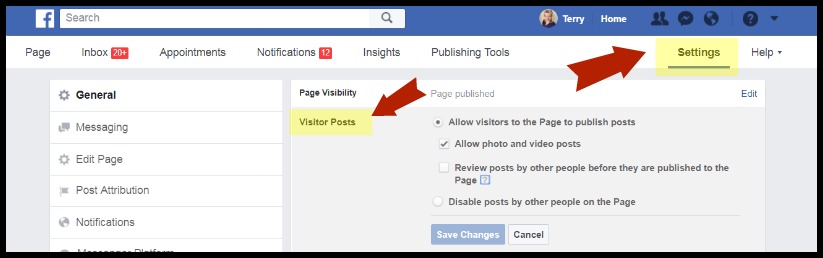
The first step is to turn on the option to allow people visiting the page to post. Go to your Page, then click on the Settings tab, and then click on Visitor Posts.
Select the option that will allow visitors to the Page to publish posts (and choose the Review feature if you want to manually review each post in your Activity Log before it is published).
Now that you’ve allowed others to post to your Page, you’ll want to make sure none of them incorrectly get flagged as spam.
It takes just a few steps to find those flagged posts and “unmark” them if you want them to show up on your Page. Or to permanently delete them from your Page.
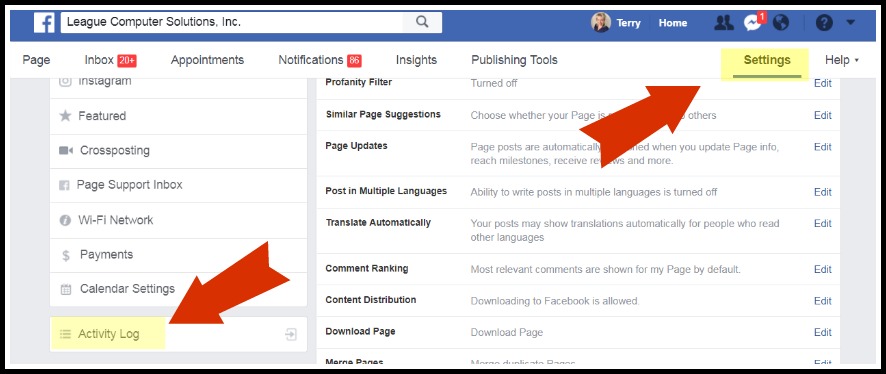
Step 1: Go to your Page’s Activity Log
From your Page, go to the Settings tab and then click your Activity Log.
Step 2: View All Flagged Posts (Spam)
Click on the “Spam” tab in the left navigation menu.
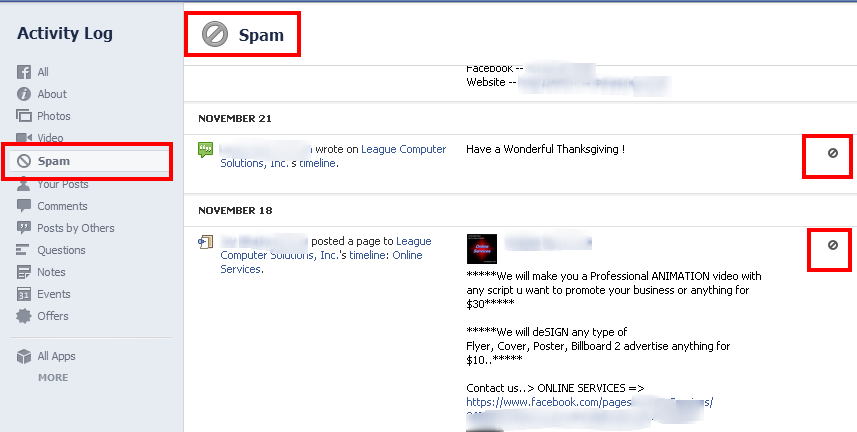
You will see a chronological listing of any posts marked as spam. (Facebook decides what looks like “spam”.)
Step 3: Take action for each post
To take action on a flagged post, just click on the icon that appears in the upper right corner of each post.
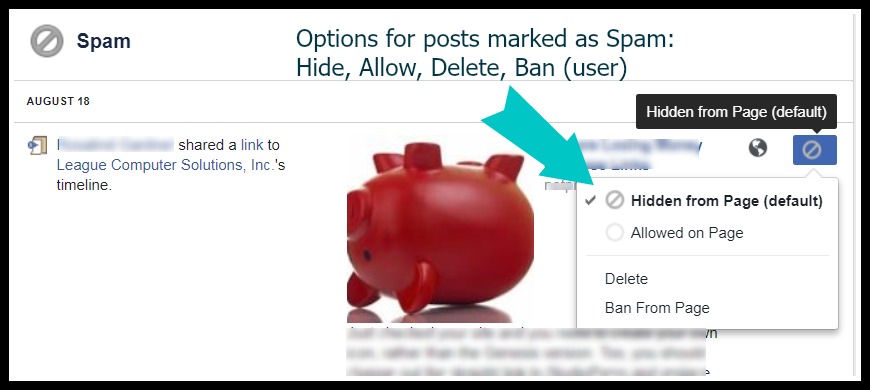
You have 4 options for each post:
- Hide the post from your Page (which is Facebook’s default setting)
- Allow the post to appear on your Page
- Delete the post from your Spam folder and Page
- Ban the user from posting to your Page
Click on the option you wish to take. I recommend adding this step to your regular list of Facebook Page management tasks since you don’t want legitimate posts from your Fans to accidentally be marked as spam.
Want to learn more about optimizing your Facebook Page?
Check out 2 blog posts that go over top features:
How to Use 12 Top Features to Manage your Page
8 (More) Features to Optimize your Facebook Page
Questions? As always, you can contact me through comments here on the blog, through email: terry@leaguecomputers.com or by filling out our contact form (click here). We offer a free, 15-minute consultation to discuss your small business’ social media strategy and answer any questions about how we can help!
[This post has been updated as of January 23, 2018]