Promoting your Pins and Boards on other social media sites is a great way to drive traffic to your Pinterest account. With a strategy and a few power-user tips, you can start growing your Pinterest community today!
Here are 4 power tips you can try:
Power Tip 1. Share a Top Board on Other Social Sites
Build up a board with at least 20 Pins on a topic of interest to your target audience.
Share the board’s unique URL on your other social sites on a regular basis. For example, our top board, Social Media Strategy for Small Business has the URL:
http://www.pinterest.com/socialmedialcs/social-media-strategy-for-small-business/
We can simply copy the URL from the browser and then share (paste) it on our Facebook Page or Twitter account with a call-to-action: “Visit our Social Media Strategy Board for 100+ Pins to help your small business”.
Share your top Boards on a regular, rotating basis on your social sites.
To easily track how many clicks your shared board gets, you can use a link shortening tool, like bit.ly, and then check the clicks on your bit.ly account. A bit.ly account is free to set up and use.
Note: Make sure your top boards are the first ones users see on your Pinterest account! Since this Social Media Strategy board is one of the boards we want people to follow, it’s also the first board visible on our account.
Power Tip 2. Create a “Pin It for Later” link
This strategy is one from Peg Fitzpatrick’s article: Five Easy Steps to Bake the Perfect Google+ Post . I use it for sharing the best content I find from others as well as my own blog posts.
Step 1: Pin the blog post (yours or others’) to a board on your Pinterest account.
Step 2: Copy that Pin’s unique URL – you should see it in your browser.
Step 3: Create a status update on Facebook or Google+, share the original article link (as a link-post or in the text of a photo upload) and then add/paste the Pin’s URL. I usually say “Pin it for later:” followed by the link.
See an example in the image below:
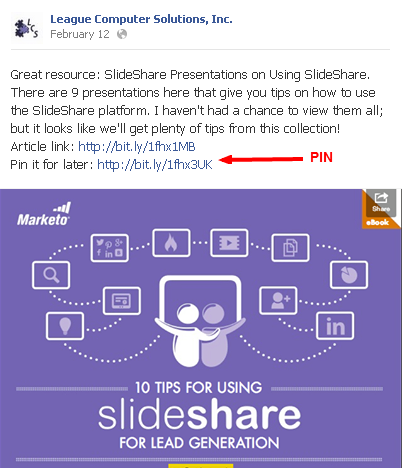
Pin it for later strategy on Facebook post
Your “pin it” link helps people who are short on time. They can save the post (as a Pin) for reading later, plus you are driving traffic to your Pinterest account. Readers are re-pinning it from your Pinterest board.
Power Tip 3. Share your Pins on Twitter as Photos, with the Auto Photo Preview
There are several different ways to share Pins on Twitter as a photo (instead of just a link).
Option #1 – Use the Post to Twitter option on each Pin within Pinterest
Step 1: Once you’ve linked your Twitter and Pinterest accounts, you will see the “Post to Twitter” box on each Pin that you upload/re-pin to a public board. See example below:
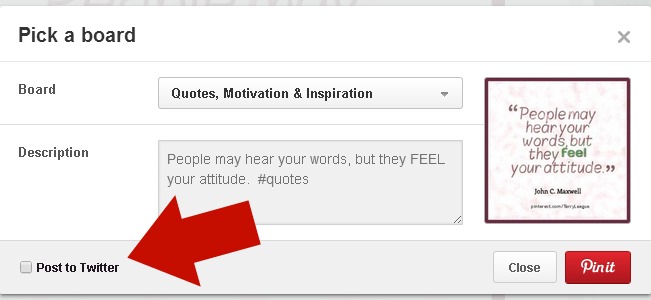
Post a Pin to Twitter within Pinterest
Step 2: Just check that box and your Pin automatically shows up in Twitter with a “rich” summary. According to Kristoffer Howes – see his post on Google+ here – a rich summary on Twitter shows:
- The first 100 characters of your Pin’s description in the Tweet
- The image of your Pin
- The board where the Pin is located
- The first 195 characters of your Pin’s description in the rich summary description
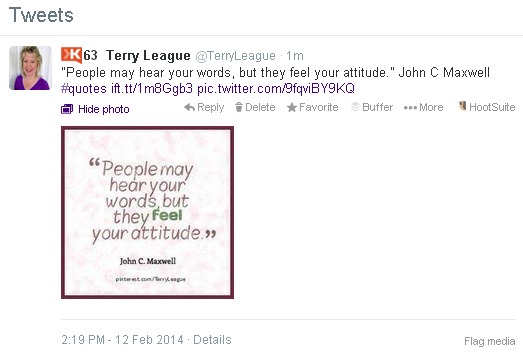
This is how your Pin appears on Twitter with a rich summary:

Pin shared on Twitter with a “Rich Summary”
Option #2 – Use a Recipe from IFTTT
Another great strategy from Peg Fitzpatrick is to use a recipe from IFTTT.com (If this, then that), so you can automatically send your Pins to Twitter. With Twitter’s auto photo preview feature and this recipe, your Twitter followers will see the image of your Pin, instead of just the link.
IFTTT is free to use and you may find some additional useful recipes for other social sites or functions.

You will need the RSS feed of your Pinterest account, which is simply the account URL (go to your Pinterest Profile Page and look in your browser), followed by/feed.rss. For example, my Pinterest feed is
http://www.Pinterest.com/terryleague/feed.rss
where you would just replace my username with yours.
Note: this recipe from Peg will share ALL Pins you put on any public Board, so keep that in mind if you are a “power” Pinner. You may not want to share 20 Pins on Twitter! Your Followers may not want to see 20 photos a day from you!
An alternative recipe that I put in place was to create a new Board called “Pins Shared to Twitter” (creative title, I know!) and then pin 1-2 Pins max per day to that board.
Those 1-2 Pins are the only ones shared to Twitter. I can pin another 20 or more Pins to my other boards and not overwhelm my Twitter Followers’ streams.
The RSS feed for a specific Board looks like this:
http://www.pinterest.com/terryleague/pins-shared-on-twitter.rss
where you see my username, followed by the specific board name with .rss at the end. This is the RSS feed you place in your IFTTT recipe (replacing my info with your username and board name).
Having a separate board for Twitter Pins is also a great way to easily keep track of what I’ve shared to Twitter.
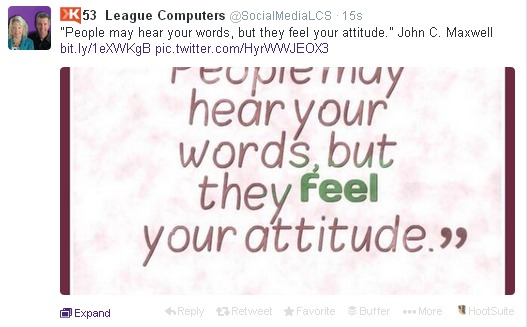
See an example below:
Pin shared on Twitter with IFTTT Recipe
Option #3 – Use Buffer to post a Pin
If you use the Buffer App, you can post your Pin as a photo with the full photo preview size.
Step 1: Go to the Pin you want to “buffer” and click on it (open it up in the Pinterest full-view)
Step 2: Right-Click on your mouse (Windows/PC) to open up a window and choose Buffer this Image. This takes you to the Buffer dashboard where you can edit the text for your Tweet.
Step 3: Share immediately or add to your Buffer schedule and the Pin will appear as a Tweet with a full photo preview.
See an example below (notice how this option shows the full “preview” size, so you need to be aware of text placement):
Pin shared to Twitter using Buffer App
Power Tip 4. Share Pinterest Pins to your Instagram Account
Send Instagram followers to your Pinterest board by sharing Pins with a text overlay.
Step 1: Go to your Pinterest board (public or secret boards) from your phone.
Step 2: Click on the Pin you want to share to Instagram.
Step 3: Save the image of the Pin to your phone.
Step 4: Go to Instagram and create a new post.
Step 5: Go to your camera roll and find the Pin you just downloaded.
Step 6: Edit and share as you normally would.
Tips:
For the best looking images, use Pins that are a square shape. Pins with too much writing (especially in smaller fonts) do not show up well on Instagram.
Make sure you put a text overlay of your Pinterest account on the Pin. That way, users in Instagram can easily find your Pinterest account.
You can use a tool like PicMonkey to add the text when you first create the Pin or use other Instagram Apps to add the text for your account on top of the Pin (just like you add text to any other photo you take).
See a screenshot of my Instagram profile highlighting this type of image:
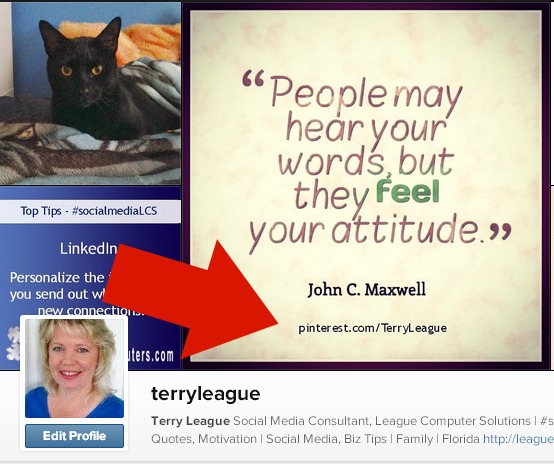
Pin on Instagram with text overlay of Pinterest account
Try one or more of these power tips and start promoting your top Pinterest boards and Pins to your communities on other social sites.