When you share a blog post image to the major social networks, you want it to stand out. So it’s important to know the optimal image sizes for each site, as well as what to do differently when sharing across several platforms at once. So use the 4 tips below to optimize your visual content on Pinterest.
Tip #1: Make your Pins big enough to get noticed
Since Pinterest is a visual-based site, your content has to quickly catch users’ attention. So it’s important to stay up-to-date on the latest recommended Pin dimensions.
Images created in a square/portrait orientation show up better than a horizontal/landscape oriented image. If you take a look at the Pin templates on photo editors Canva and PicMonkey (it’s available in the paid version of PicMonkey), you’ll see the dimensions are 735 x 1102 pixels and 700 x 1000 pixels, respectively. So that is a good place to start when creating your Pins.
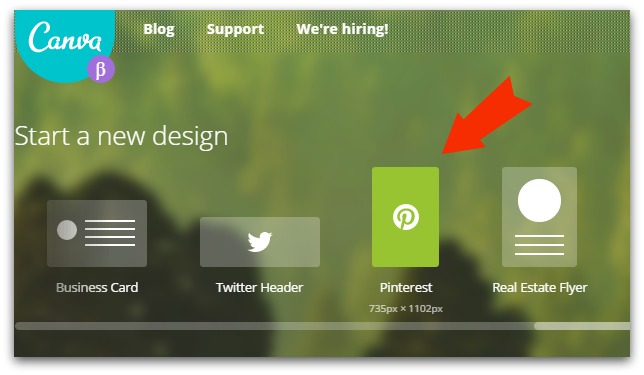
Canva Pin Template
Infographics are typically much taller, and while Pinterest does not have a maximum vertical limit, you’ll find that 735 x 2000 pixels is a safe size to use. Make adjustments depending on your content, but keep in mind that very “tall” Pins may not show in their entirety on mobile devices.
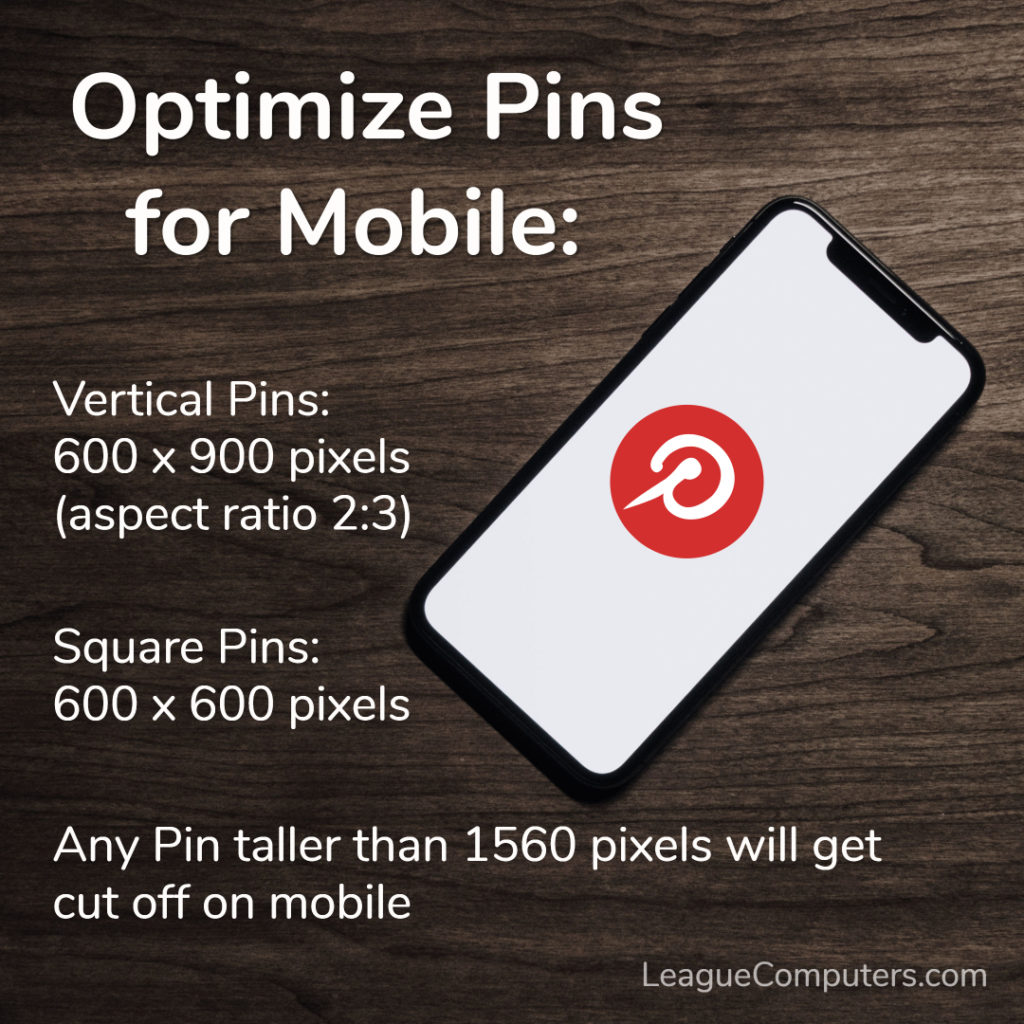
[Update 2018] Pinterest has shared some recommendations for the optimal Pin sizes for viewing on mobile devices. Since 80% of Pinterest usage occurs on mobile devices, you want to make sure your Pins look good on a mobile feed.
- Pinterest recommends an optimal image size of 600 x 900 pixels (aspect ratio 2:3) for vertical Pins.
- Square Pins (600 pixels x 600 pixels) work well too.
- Any Pin taller than 1560 pixels will get cut off on mobile (note that if someone clicks on the truncated image, they will see the full-size Pin).
Note: Here’s a strategy for creating multiple versions of your blog post images:
If you are sharing your blog posts (or visual content) to Facebook as well as Pinterest, then you’ll find that Facebook’s optimal size for link posts does not fit well with Pinterest’s optimal size for Pins.
One strategy is to create multiple versions of your blog post image (yes, it takes more of your time, but can be worth it to get better results on the individual sites).
If you have an image you can easily edit, then crop one version for Facebook’s 1200 x 627 size, and then create a second crop for Pinterest’s 736 x 1102 dimensions. This may not work for every image, so you’ll have to get creative. You can:
- Create one image for Facebook’s dimensions, and then create a collage using several images or cropped sections from the original image.
- Create one image that is optimized for Facebook and then use PicMonkey or Canva to overlay the original image onto a blank canvas with the right Pinterest dimensions.
Tip #2: Use keywords everywhere you can
Keywords are important in Pinterest search, so make sure you are putting them in all fields possible.
Pinterest Board names are indexed by Google, so use keywords that people will be typing to search for those topics.
Be specific in Board descriptions: explain the board’s purpose, what types of Pins users will find there, and include a call-to-action if you want to send users to your website.
Your Pin needs a description made up of keywords for search purposes as well. You have a maximum of 500 characters available, but keep in mind that mobile devices may truncate the description somewhere closer to 200 characters. Also think of users scrolling through many Pins: you want to optimize your Pin’s description in the very beginning to catch their attention.
A good rule of thumb is to think of the first sentence in your Pin’s description much like Twitter (with 140 characters) – create a “headline” that catches attention, and then include more text if necessary.
Hashtags are clickable in Pin descriptions, but are used more as a topical addition, so you may want to only use 1-2 that enhance the topics used in the text.
Note: with Pinterest’s new guided search feature, it is a good idea to do a little research on the hashtags you’re considering, to see what other hashtags/topics pop up in the search menu.
You can also type a website URL in a Pin’s description, and it becomes a clickable link.
Tip #3: Don’t forget to properly source your Pins
Nothing is worse than spending time creating an eye-catching Pin and then forgetting to put the correct URL in the source field (I know, because I’ve done it before!)
If the source field is blank, then users don’t go anywhere when they click on the Pin.
If you pin an image directly from your website (or someone else’s site), the source field is automatically populated with the site’s URL.
But if you upload a Pin from your computer, you have to take an extra step after uploading. Once the Pin has been uploaded, go to the Pin and click on Edit. Then you’ll need to add the website/source URL in the appropriate field.
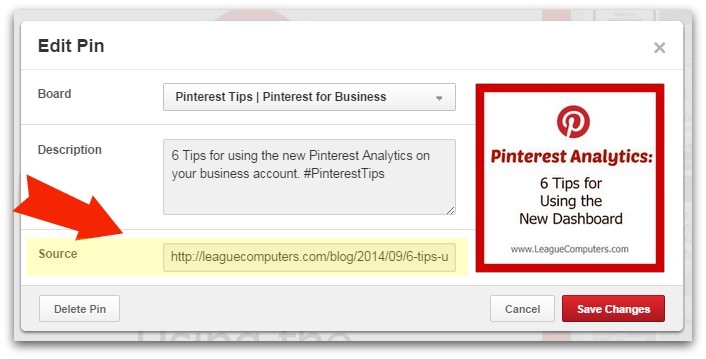
Add a Pin’s source
Tip #4: Take advantage of Pinterest tools
You can use Pinterest’s built-intools to optimize your content even more.
After creating a Pin, you can create a widget for it (or for any Board). You simply copy a Pin’s URL from your browser bar, and then paste it into the widget tool.
Then create the widget by clicking the Build It button. Next, you’ll copy and paste the generated code into your website.
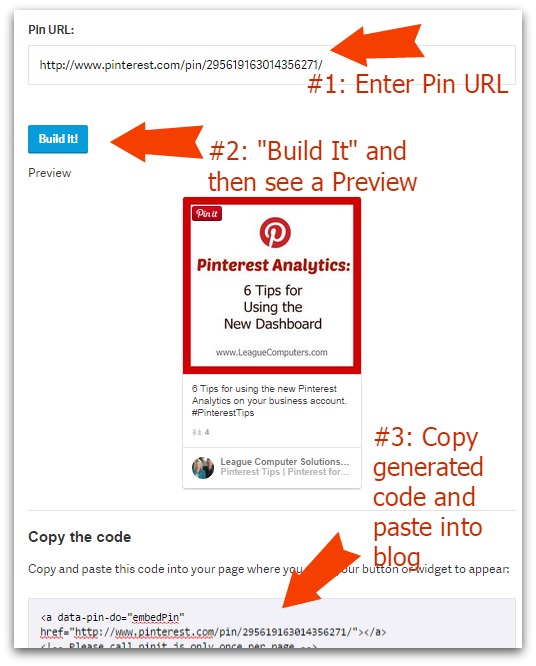
Note: the first time you use the Pin widget, you may need your webmaster’s help to insert code into your site. Once that’s done, all you need to do is insert the generated code (top line only) into the appropriate blog post.
Using a Pin widget is one way to get around the sometimes-conflicting image sizes between social sites. You can have your main blog image sized for Facebook, and then add a Pin widget in your post that readers can simply click on to Pin.
Add a line of text above the Pin “Ready to Pin” so they know why it’s there.
Rich Pins are another more advanced tool available, that again will require some help from your webmaster to set up. But Rich Pins are a definite plus when you are selling items from your website, as the price (and any future price changes) are automatically included when you create the Pin.
See more about Rich Pins here.
So use these 4 tips to make sure the content you create and upload to Pinterest is optimized for the site. You’ll see your Pins get more re-Pins, and drive more traffic to your website.
Ready to Pin:
Need some help with your Pinterest strategy? We offer a Free Consultation (through email or phone) to go over your questions and determine the next, best steps for your business. Contact us today to set one up!