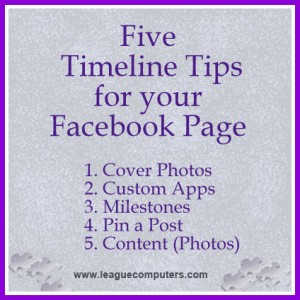
 If you are just setting up your Facebook Page or want to review some important tips to build engagement, the following five tips for Timeline on your Facebook Page will help:
TIP #1: COVER PHOTO RULES:
If you are using a photo or graphic in your Cover Photo, make sure you follow Facebook’s rules: Covers can not include price or purchase information, contact information (website address, email, mailing address), references to Facebook features or actions (“Like”, “Share” or an arrow pointing to any feature) or calls to action.
**You can change your Cover Photo any time you want, so it’s a good idea to have a few to rotate. Put a live link to your website or landing page in the description of your cover photo so whenever users click on the cover photo, you give them a call to action.**
TIP #2: CUSTOM APPS (TABS):
Four Apps are shown under your Timeline Cover (a maximum of 12 Apps are displayed by clicking on the arrow next to the 4th App). The “Photos” App cannot be moved, but you can re-position the others. Choose your most important Apps for the 3 remaining top positions and give your users a call to action to encourage engagement.
***Each App (Tab) has its own unique url (click on the App then notice the url in your browser), so put that url (use a url shortener like bitly) in calls to action: in your Timeline posts, in FB ads, on other posts in Twitter, Google+, etc.***
TIP #3: POSTS FOR YOUR COMPANY’S FOUNDED DATE AND MILESTONES:
The Timeline is supposed to encourage a business to tell its “story”. Two ways to do that are to create a Post for when your business was Founded (or Launched, Opened, etc) and then fill in your Timeline with Milestone Posts. You must first create your Founded Post in order to add Milestones (if you click on the Milestone icon in the status box, you will be prompted to add your Founded Post first).
***Since you can “back date” your Milestones, you may want to check the box to hide the Milestone from your News Feed so your Fans aren’t bombarded with posts if you add a series of Milestones in one session.***
TIP #4: PIN A POST:
A great way to catch a user’s attention is to “Pin” a post to the top of your Timeline. Simply click on the edit (pencil) icon in the top right corner of your post and select “Pin to Top”. A post will stay “pinned” for a maximum of 7 days, but to encourage engagement, you may want pin a new post every few days.
***Use this feature to repeat a message or remind visitors/fans of promotions/announcements – instead of creating many different versions of the same post, simply “re-pin” key posts by finding them on your Timeline (using the Activity Log to view “your posts” may be quicker) and choosing the Pin to Top option again.***
TIP #5: CONTENT STRATEGY (PHOTOS):
One of the biggest changes with Timeline is the prominent display of photos. The Cover Photo, the size of pictures in posts, the Highlight option and the option to view photos as full-screen – all are great features for a business that sells products. But if you are a service-oriented business, you may want to make some adjustments to your existing content strategy to include more photos, since pictures gain the most reach and engagement according to recent statistics.
***What kinds of photos can you include? Photos of the people that make up your business, your happy customers, your office and surrounding locale…in addition to sharing images of quotes, inspiration, current events…these are a few ideas for adding photos to your content strategy and creating engagement on your Page.***
These five tips for Timeline on your Facebook Page will help you get started. Check back for more tips on content and engagement strategies.
