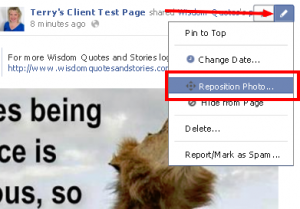
 This week’s Quick Social Media Tip is how to reposition a photo on your Facebook Timeline.
If you upload or share an image that doesn’t “fit” into the standard Facebook post size, you can quickly reposition the image so it appears more centered or so you can draw attention to a certain part of that image.
For example, here is a screenshot of a great quote/image I’ve shared on my Timeline. Notice how some of the letters are cut off on the left side:
To reposition the image, so the text is more “readable”, you simply click on the Edit Icon (the pencil in the upper right corner of the post) and then click on Reposition Photo.
Then you move the image into a better position and click on the Save button. Now the text is completely visible, while still keeping most of the lion in the post too. (When users click on the image, they will still see it in its original size.)
Take a look at your Page’s Timeline to see if there are any images you could reposition to make your Page more visually-appealing to your Fans. Little changes like this can sometimes make a big difference in how attractive your Page is to other Facebook users.


