 In just a few minutes, you can create a Facebook Cover Photo with one of my favorite free tools – PicMonkey. Go to picmonkey.com. There is a free version and a paid version, but don’t worry: you can create your Cover Photo with the free version. So far, that’s all I’ve ever used.
Follow these 8 quick steps and you’ll have a new Cover Photo in minutes:
Step #1:
From the Home page click on Create a Collage.

Step #2:
On the left navigation menu, click on the second icon: Layouts.
You’ll then see an option for Facebook “FB” Cover and when you click on that you’ll see several different layout options. Choose the layout you want, depending on how many photos you are using.
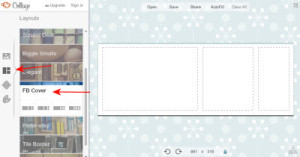
Note: all the templates are 851 x 315 pixels, which is the exact size of a Facebook Cover Photo.
Step #3:
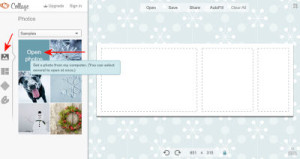
Click on the Images icon in the left navigation.
Then just click on Open Photos to start uploading photos from your computer.
Step #4:
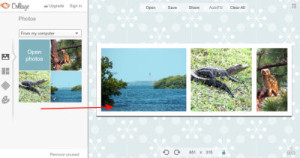
Once you’ve uploaded your photos, you simply move them over to the template boxes with your mouse. You can re-arrange the photos as much as you want and increase/decrease the sizes of the photo boxes.
Step #5:
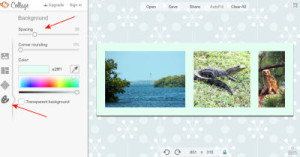
If you want to put a tagline or line of text on your collage, then you need to make room for it here. Click on the last option (Background) on the left navigation and adjust the Spacing of the background. You can also change the color of your background.
When you are satisfied with the look of your new collage, click on the Save button and save the file to your computer.
Step #6:
Now all you need to do is add some text to your collage and then re-save the file.
Click on the X in the upper right corner to close this screen.
Step #7:
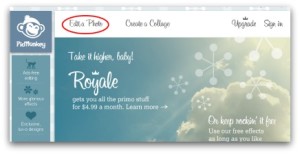
You should be back at PicMonkey’s Home page. Now click on Edit a Photo to add text.
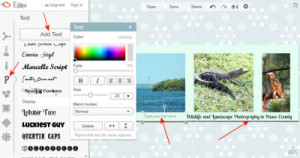
Once you’ve uploaded your newly created collage, click on the Text icon in the left navigation (noted with the letter P).
Then you will select a font style – there are a lot to choose from (you will notice that some fonts, with a “crown” beside them, are for paid users only).
Choose the font color, adjust the font size, type your font in the box that pops up and then move the text box wherever you want.
Step #8:
Since this is now a “new” version of your collage, you must Save it again. Once you’ve done that, it is ready to upload to your Facebook page, just like any other photo.
If you need more help or would like us to create a Cover Photo for you, we offer a complete Fan Page Design Package or the option of a Cover Photo by itself. Just let us know!- terry@leaguecomputers.com
